
DIY card holder made of Kraf-tex paper, that looks and feels like leather but sews, cuts and washes just like fabric. This project requires no sewing.
Relatively easy to make with a nice result. Decorate it with colours of your choice, alter it with embellishments and create a card holder for you or to offer as gift.
The card holder keeps up to 8 cards, but you add more pockets up to 12.
Materials used
- Kraft-Tex Kraft Paper Fabric – 0.5m White
- Leane Creatief Cutting Dies – Multi Flower 8 Blossom 450577
- Tsukineko VersaColor Pigment Ink Pad Small – Black #82
- Psst Watercolour Glimmer Mist Spray – Red
- Viva Decor Clear Silicone Stamps – Brick & Wood #103
- Buddly Crafts 23mm Metal Book Corners – 20pcs Silver Tone BC1
- Hobby & Crafting Fun Magnets Extra Strong – 8 pcs
Tools used
- Joy! Crafts Sponge Daubers
- Craft knife
- Glue
From the kraft-tex paper cut the following pieces:
1pc of 30x12cm which is the cover, 7pcs of 5x12cm which are the pockets.
In case you need more pockets cut more of the small ones.

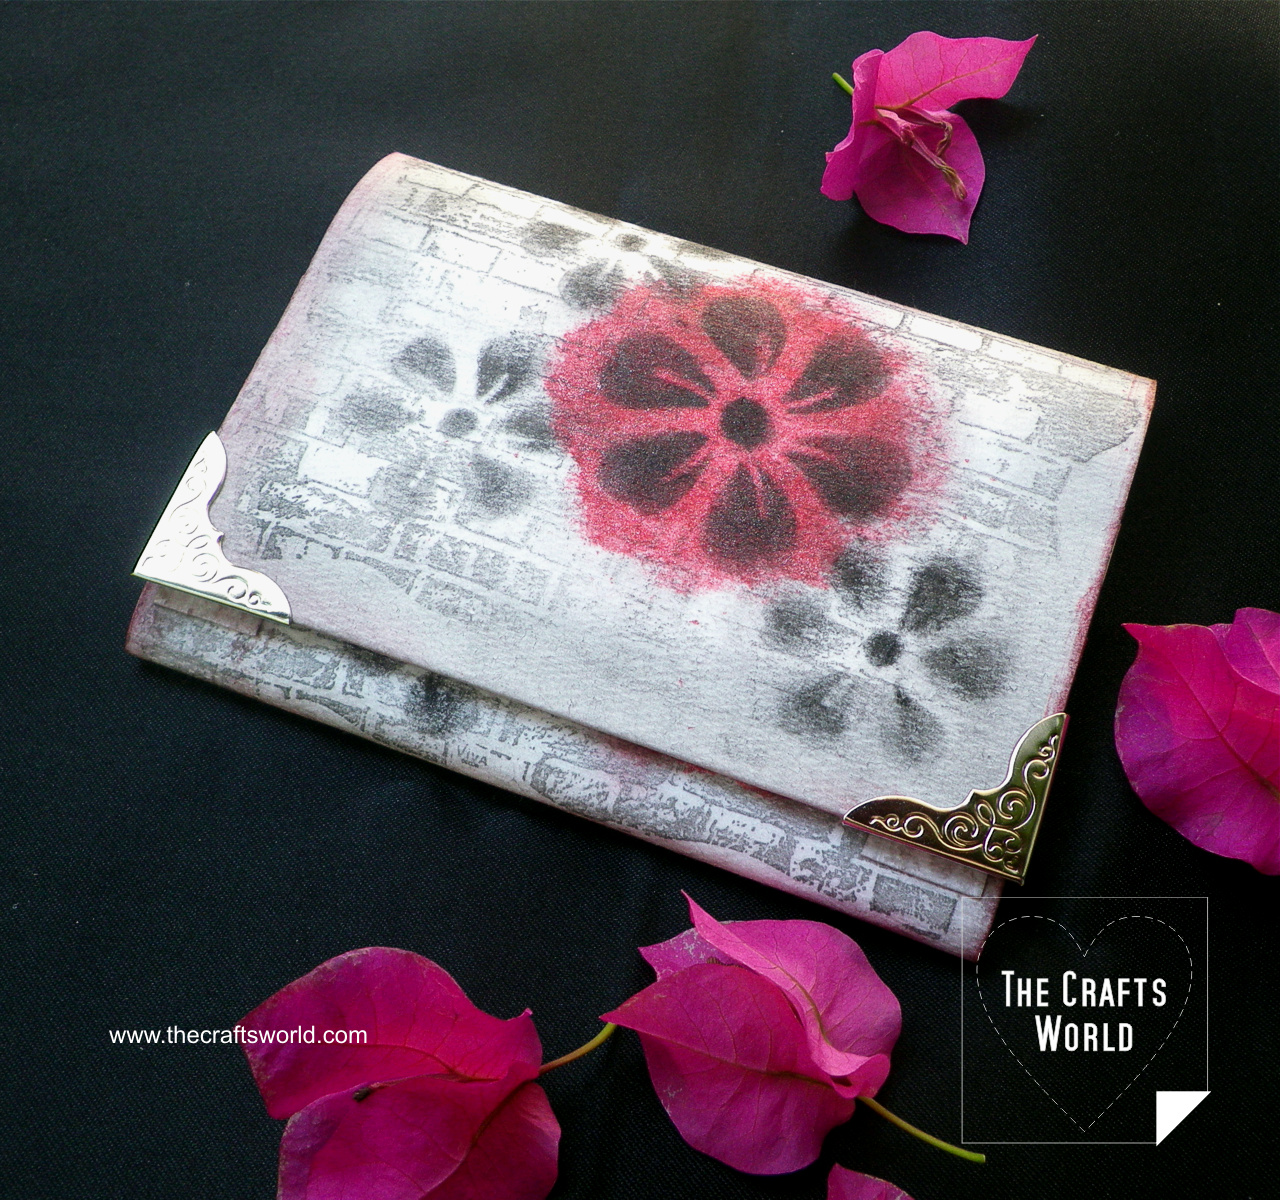
Stamp one side of the long piece with the brick stamp and the black ink in about 9cm spaces.

Spay on a sponge dauber and create round shapes on the stamped side.

Use the middle flower die as a stencil and with the black ink and the sponge dauber stamp on the red circles.

Continue with the smaller flower die and the black ink and stamp more flowers.

Turn on the other side and mark 1cm and 2cm from the right edge to set the card pockets.

Use glue on the two short and the one long side of pocket. The long glued part will go to the 2cm mark. Continue with the next by placing on the 1cm mark. Then with the third where the long side will go on the edge of the cover. Let the glue dry well before going to next one to avoid the two pocket get glued together.
Continue with the center pockets by marking 9.5cm 10.5cm and 11.5cm from the same right edge. Place the first pocket on the 11.5cm, then on the 10.5cm and finally on the 9.5cm mark.

On the left side now, mark 3.5cm from the edge and score. Glue the 7th pocket close to the scoring mark.

Stamp and distress the inner now side with the pockets, applying same technique as above.

Fold in the 3.5cm flap (scored before) and glue only the left and right sides. You now have an 8th pocket. Use paper binders to secure it until the glue dries (binders can be used on all pockets when glued to help fix them well).

Set the metallic corners.

Cut 2pcs of kraft-tex 1.5×1.5cm

Cover the magnets and glue them on the outside of the left pocket flap

The inside of the card holder
Leave a Reply
You must be logged in to post a comment.