
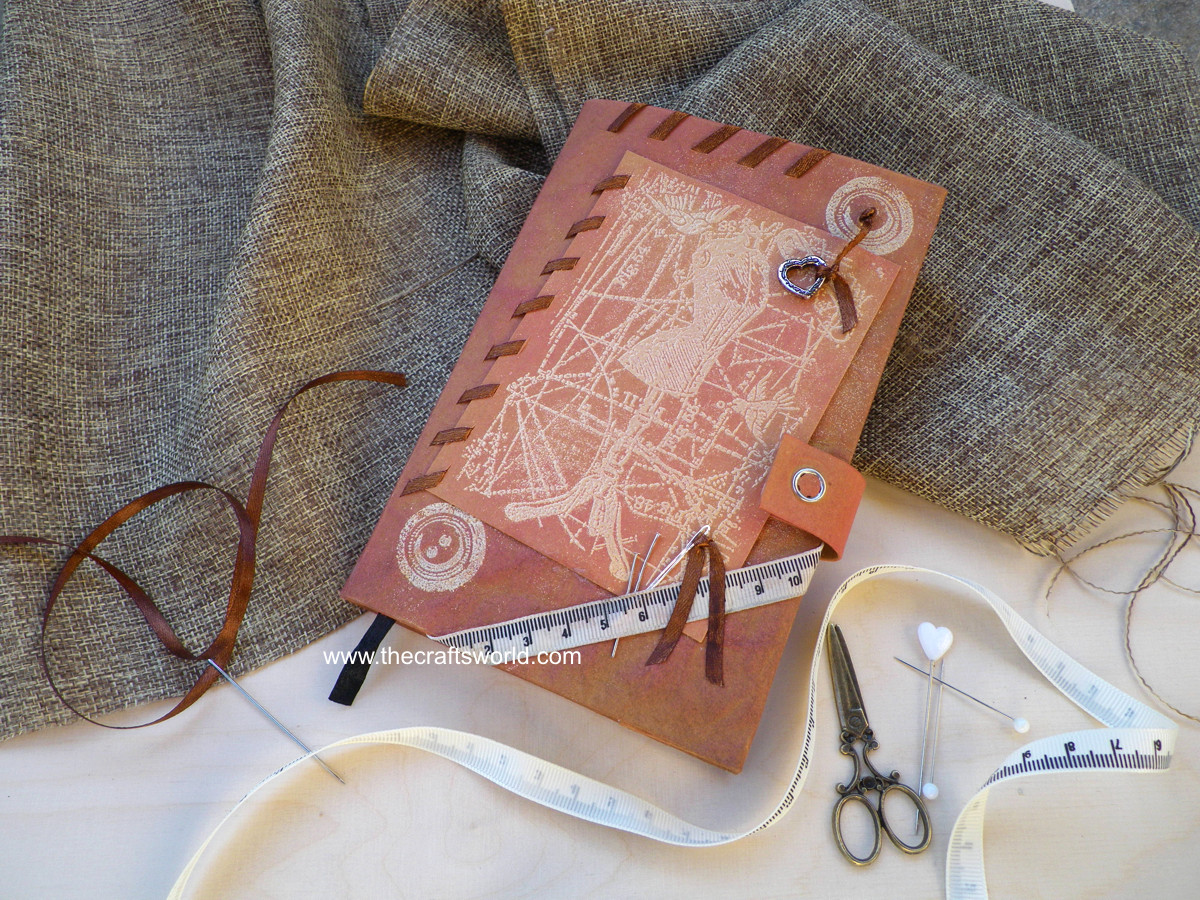
Notebook cover tutorial exclusively made for Cuddly Buddly, this cover can be used for notebooks, calendars and diaries. It is removable and can be used over and over again due to the durability of Kraft-tex material used. You can find full details and materials with step by steps instructions below or visit the Cuddly Buddly Blog for this and more projects on March’s theme.
Materials used
Kraft-Tex Kraft Paper Fabric – Natural
H&CF Metal Charms – 8 pcs 14mm Hearts #8906
Hemline Snap Fasteners – Silver 15mm
Knorr Prandell Satin Ribbon – 3mm Brown #057
Bertie’s Bows Grosgrain Ribbon – 9mm Tape Measure cm
Viva Decor Clear Silicone Stamps – Paris Couture #82
Viva Decor Clear Silicone Stamps – Tailoring Backgrounds #84
M BOSS Embossing Powder – Silky Gold
Tsukinenko VersaMark Watermark Stamp Pad
Tsukineko Memento Luxe Ink Pad – Rhubarb Stalk
Tsukineko Memento Luxe Ink Pad – Rich Cocoa
Hobby & Crafting Fun Head Pins – 32mm Platinum
Knorr Prandell Craft Wire ⌀1mm – Silver Plated
Tools
Glue
Heat gun
Scissors
Art knife
Cut the kraft-tex paper according to the size of the notebook or diary you will place in.The best way is to wrap a large piece of the paper and mark extra 3cm length on both left and right sides, and 2cm extra length on top and bottom sides.For this project a total of 30cm x 18cm paper is used. A 12cm x 8.5cm piece for the front card and a 17cm x 4cm for the binding.

Spray well with water the kraft-tex paper on both sides. Crumble the paper. Straighten it and let it dry or use a heat gun to speed up the process.

Score the paper, 3cm on left and right (creating book flaps), 1cm wide in the center and 0.5cm on top and bottom.


Sponge daubing very lightly with the rich cocoa ink first and then more intensive with the rhubarb ink. For the card and binding paper cuttings use the rhubarb ink only.

Stamp and emboss the button stamp on the cover and the mannequin stamp on the card.

Fold and glue the top and bottom sides at the 0.5cm scoring marks. Fold the left and right flaps now and glue ONLY to the top and bottom (0.5cm folded sides).

Place the front card on the cover and with an art knife cut 0.5cm openings on both papers. Sew the 3mm ribbon through the papers.
Do the same on the top side and through the top button holes, leaving some ribbon to tie the heart charm.
Do NOT glue the card at this point.


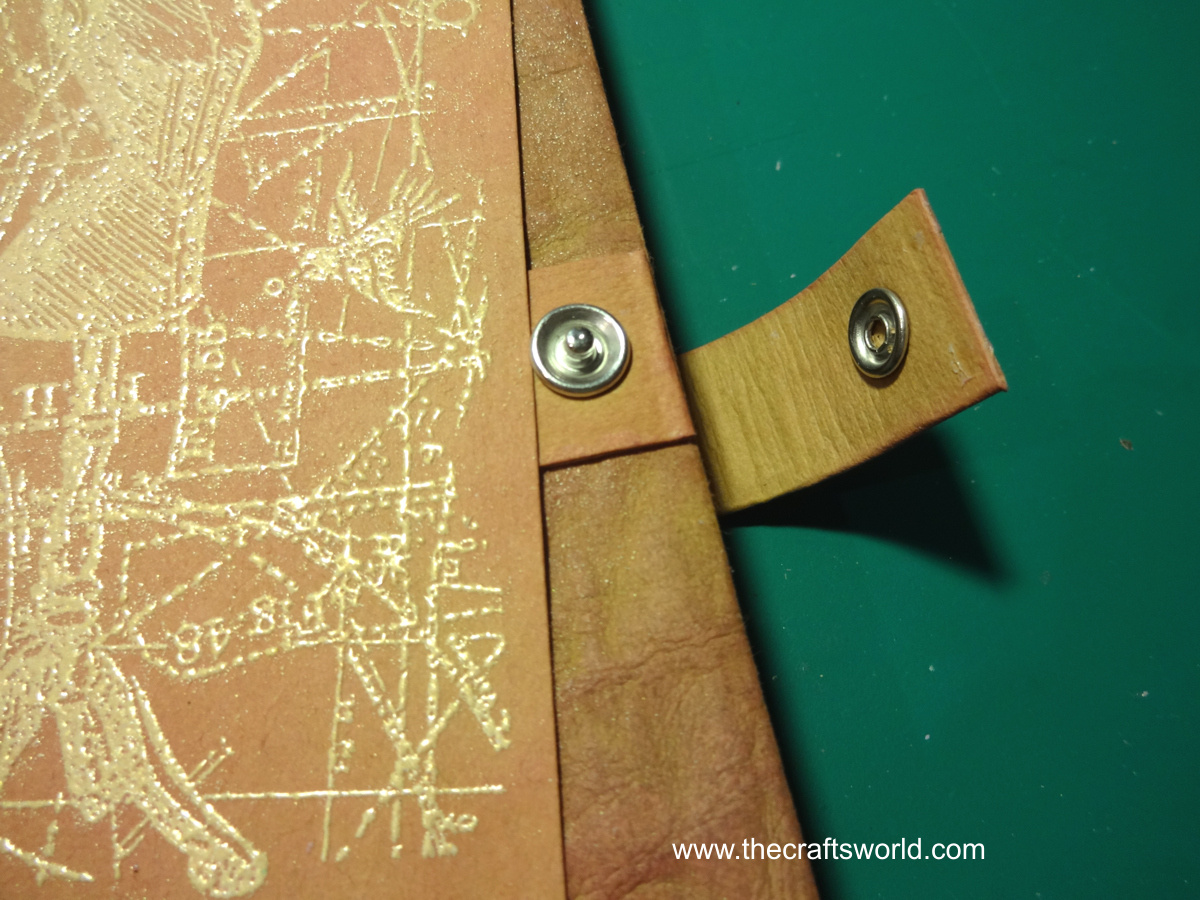
Half fold at the long side the 17x4cm piece and then cut a 3cm long piece from it, which will be used at the front side of the cover. Now, glue the long remaining piece to the back of the cover.
Place snap fasteners on both pieces.

Glue the 3cm long piece to the front of the cover and partially under the card. Then, glue the card on the cover.
Finally, cut the printed ribbon, lightly inked it with the rich cocoa ink and glue it on the front. Before the glue gets dry place a couple of pins. The needle here is created by folding a piece of the wire and passing through some ribbon.
[…] Fin the tutorial for the Notebook cover here– Sewing | The Crafts World. […]
[…] Βρείτε βήμα προς βήμα οδηγίες μαζί με όλα τα υλικά εδώ ή στο blog του Cuddly Buddly μαζί με άλλες […]
[…] http://thecraftsworld.com/tcw/archives/622 […]